Difference between revisions of "Bus"
From Tycoon Gaming
m |
m |
||
| (16 intermediate revisions by 9 users not shown) | |||
| Line 1: | Line 1: | ||
{{otherlang | {{otherlang | ||
| noborder=true | | noborder=true | ||
| + | | dk=Dk:Bus | ||
| + | | fr=Fr:Bus | ||
| nl=NL:Bus | | nl=NL:Bus | ||
| + | | es=ES:Bus | ||
| + | | pl=Pl:Bus | ||
| + | | ar=Ar:Bus | ||
}} | }} | ||
| − | |||
<!-- | <!-- | ||
{{Information | {{Information | ||
| Line 25: | Line 29: | ||
The number of fares you have per trip affects the Experience you will receive at the end of the route. | The number of fares you have per trip affects the Experience you will receive at the end of the route. | ||
Money seems to be randomized and is independent of the number of fares you have, but does depend on the level of bus you have. The higher level a bus is, the more average payment you will receive. | Money seems to be randomized and is independent of the number of fares you have, but does depend on the level of bus you have. The higher level a bus is, the more average payment you will receive. | ||
| + | |||
| + | Note:Not Every Bus is Compatible with Lower Tier Routes | ||
==Vehicles== | ==Vehicles== | ||
| − | { | + | {{Car_Dealer/Job_Vehicles/Bus}} |
| − | |||
| − | |||
| − | |||
| − | |||
| − | |||
| − | |||
| − | |||
| − | |||
| − | |||
| − | |||
| − | |||
| − | |||
| − | |||
| − | |||
| − | |||
| − | |||
| − | |||
| − | |||
| − | |||
| − | |||
| − | |||
| − | |||
| − | |||
| − | |||
| − | |||
| − | |||
| − | |||
| − | |||
| − | |||
| − | |||
| − | |||
| − | |||
| − | |||
| − | |||
| − | |||
| − | |||
| − | |||
| − | |||
| − | |||
| − | |||
| − | |||
| − | |||
| − | |||
| − | |||
| − | |||
| − | |||
| − | |||
| − | |||
| − | |||
| − | |||
| − | |||
| − | |||
| − | |||
| − | |||
| − | |||
| − | |||
| − | |||
| − | |||
| − | |||
| − | |||
| − | |||
| − | |||
| − | |||
| − | |||
| − | |||
| − | |||
| − | |||
| − | |||
| − | |||
| − | |||
| − | |||
| − | |||
| − | |||
| − | |||
| − | |||
| − | |||
| − | |||
| − | |||
| − | |||
| − | |||
| − | |||
| − | |||
| − | |||
| − | |||
| − | |||
| − | |||
| − | |||
| − | |||
| − | |||
| − | |||
| − | |||
==Routes == | ==Routes == | ||
| Line 140: | Line 55: | ||
! data-sort-type="number" style="width: 10%" |'''Stops''' | ! data-sort-type="number" style="width: 10%" |'''Stops''' | ||
|- | |- | ||
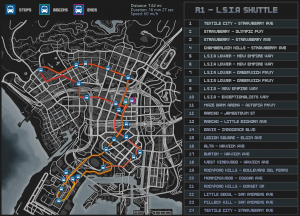
| − | |<div | + | |<div class="tooltip">R1: L.S.I.A Shuttle<span>[[File:R1 - L.S.I.A Shuttle.png|none|thumb|300px]]</span></div> |
|Los Santos | |Los Santos | ||
|1 | |1 | ||
| Line 146: | Line 61: | ||
|9 | |9 | ||
|- | |- | ||
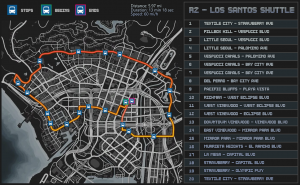
| − | |<div | + | |<div class="tooltip">R2: Los Santos Shuttle<span>[[File:R2 - Los Santos Shuttle.png|none|thumb|300px]]</span></div> |
|Los Santos | |Los Santos | ||
|1 | |1 | ||
| Line 158: | Line 73: | ||
|13 | |13 | ||
|- | |- | ||
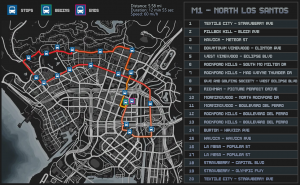
| − | |<div | + | |<div class="tooltip">M1: North Los Santos<span>[[File:M1 - North Los Santos.png|none|thumb|300px]]</span></div> |
|Los Santos | |Los Santos | ||
|2 | |2 | ||
| Line 164: | Line 79: | ||
|10 | |10 | ||
|- | |- | ||
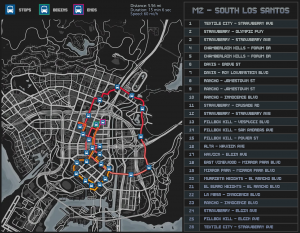
| − | |<div | + | |<div class="tooltip">M2: South Los Santos<span>[[File:M2 - South Los Santos.png|none|thumb|300px]]</span></div> |
|Los Santos | |Los Santos | ||
|2 | |2 | ||
| Line 170: | Line 85: | ||
|10 | |10 | ||
|- | |- | ||
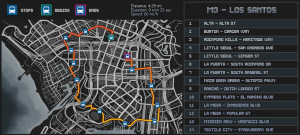
| − | |<div | + | |<div class="tooltip">M3: Los Santos<span>[[File:M3 - Los Santos.png|none|thumb|300px]]</span></div> |
|Los Santos | |Los Santos | ||
|2 | |2 | ||
| Line 176: | Line 91: | ||
|14 | |14 | ||
|- | |- | ||
| − | |<div | + | |M4: LSIA - Galileo Observatory |
| + | |Los Santos | ||
| + | |2 | ||
| + | |14 | ||
| + | |15 | ||
| + | |- | ||
| + | |M5: Vinewood Hills - Vespucci Beach | ||
| + | |Los Santos | ||
| + | |2 | ||
| + | |14 | ||
| + | |14 | ||
| + | |- | ||
| + | |M6: Strawberry - Pacific Bluffs | ||
| + | |Los Santos | ||
| + | |2 | ||
| + | |14 | ||
| + | |16 | ||
| + | |- | ||
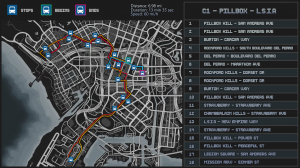
| + | |<div class="tooltip">C1: Pillbox - LSIA<span>[[File:C1 - Pillbox - LSIA.png|none|thumb|300px]]</span></div> | ||
|Los Santos | |Los Santos | ||
|3 | |3 | ||
| Line 182: | Line 115: | ||
|20 | |20 | ||
|- | |- | ||
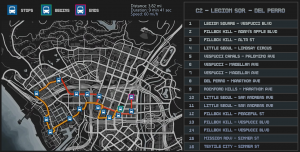
| − | |<div | + | |<div class="tooltip">C2: Legion Sqr. - Del Perro<span>[[File:C2 - Legion Sqr. - Del Perro.png|none|thumb|300px]]</span></div> |
|Los Santos | |Los Santos | ||
|3 | |3 | ||
| Line 188: | Line 121: | ||
|16 | |16 | ||
|- | |- | ||
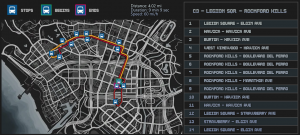
| − | |<div | + | |<div class="tooltip">C3: Legion Sqr. - Rockford Hills<span>[[File:C3 - Legion Sqr. - Rockford Hills.png|none|thumb|300px]]</span></div> |
|Los Santos | |Los Santos | ||
|3 | |3 | ||
| Line 194: | Line 127: | ||
|14 | |14 | ||
|- | |- | ||
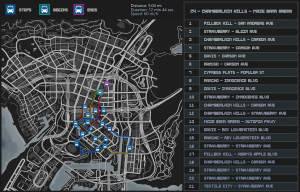
| − | |<div | + | |<div class="tooltip">C4: Chamberlain Hills - Maze Bank Arena<span>[[File:C4 - Chamberlain Hills - Maze Bank Arena.png|none|thumb|300px]]</span></div> |
|Los Santos | |Los Santos | ||
|3 | |3 | ||
| Line 200: | Line 133: | ||
|16 | |16 | ||
|- | |- | ||
| − | |C5: | + | |F2: Vespucci Beach - Downtown LS |
| + | |Los Santos | ||
| + | |3 | ||
| + | |35 | ||
| + | |11 | ||
| + | |- | ||
| + | |C5: Center - LSIA | ||
|Los Santos | |Los Santos | ||
|4 | |4 | ||
| Line 212: | Line 151: | ||
|17 | |17 | ||
|- | |- | ||
| − | |C7: | + | |C7: Textile City - Mirror Park |
|Los Santos | |Los Santos | ||
|4 | |4 | ||
| Line 266: | Line 205: | ||
|15 | |15 | ||
|- | |- | ||
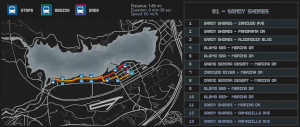
| − | |<div | + | |<div class="tooltip">B1: Sandy Shores<span>[[File:B1 - Sandy Shores.png|none|thumb|300px]]</span></div> |
|Sandy Shores | |Sandy Shores | ||
|2 | |2 | ||
| Line 272: | Line 211: | ||
|13 | |13 | ||
|- | |- | ||
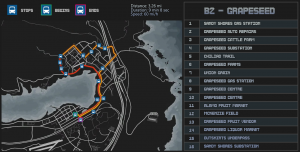
| − | |<div | + | |<div class="tooltip">B2: Grapeseed<span>[[File:B2 - Grapeseed.png|none|thumb|300px]]</span></div> |
|Sandy Shores | |Sandy Shores | ||
|2 | |2 | ||
| Line 278: | Line 217: | ||
|16 | |16 | ||
|- | |- | ||
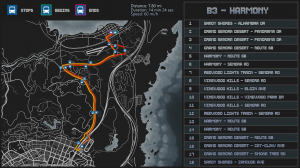
| − | |<div | + | |<div class="tooltip">B3: Harmony<span>[[File:B3_-_Harmony.png|none|thumb|300px]]</span></div> |
|Sandy Shores | |Sandy Shores | ||
|2 | |2 | ||
| Line 284: | Line 223: | ||
|18 | |18 | ||
|- | |- | ||
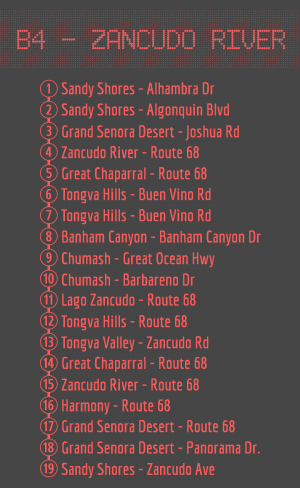
| − | |<div | + | |<div class="tooltip">B4: Zancudo River<span>[[File:B4 - Zancudo River.png|none|thumb|300px]]</span></div> |
|Sandy Shores | |Sandy Shores | ||
|2 | |2 | ||
| Line 290: | Line 229: | ||
|19 | |19 | ||
|- | |- | ||
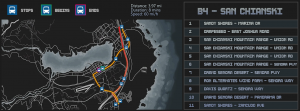
| − | |<div | + | |<div class="tooltip">B5: San Chianski<span>[[File:B5 - San Chianski.png|none|thumb|300px]]</span></div> |
|Sandy Shores | |Sandy Shores | ||
|2 | |2 | ||
| Line 296: | Line 235: | ||
|11 | |11 | ||
|- | |- | ||
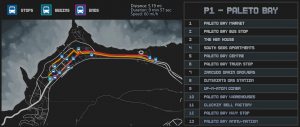
| − | |<div | + | |<div class="tooltip">P1: Paleto Bay<span>[[File:P1 - Paleto Bay.png|none|thumb|300px]]</span></div> |
|Paleto Bay | |Paleto Bay | ||
|2 | |2 | ||
| Line 302: | Line 241: | ||
|13 | |13 | ||
|- | |- | ||
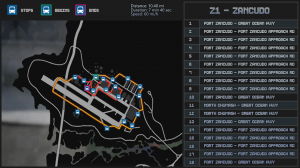
| − | |<div | + | |<div class="tooltip">Z1: Zancudo<span>[[File:Z1 - Zancudo.png|none|thumb|300px]]</span></div> |
|Zancudo | |Zancudo | ||
|2 | |2 | ||
Revision as of 18:38, 4 December 2020
The Bus Driver
job (and skill) is a small and peaceful job. You transport passengers all around, depending on the tier and location of your duty. It is easily done at lower levels for newer players!
Getting Started
- Head to the job center
 and select the Bus Driver job.
 - Purchase a bus from the car dealership
 .
. - Drive to one of the bus stations
 .
. - At the bus station find the correct bus stop for your bus tier, initiate your route there.
- Stop at the assigned bus stops
 and wait for the deboarding/boarding time.
 - You'll get paid and receive XP at the end of the route.
Pro Tip: If you can’t purchase a bus because you don’t have enough money, find one off the street, at the bus station, or ask a player if you can borrow theirs!
The number of fares you have per trip affects the Experience you will receive at the end of the route. Money seems to be randomized and is independent of the number of fares you have, but does depend on the level of bus you have. The higher level a bus is, the more average payment you will receive.
Note:Not Every Bus is Compatible with Lower Tier Routes
Vehicles
| Name | Level Requirement* | Tier | Price | Fuel |
|---|---|---|---|---|
| 1 | $25,000 | 280L (Diesel) | ||
| 7 | T1 | $50,000 | 280L (Diesel) | |
| 14 | T2 | $110,000 | 280L (Diesel) | |
| 21 | T2 | $225,000 | 280L (Diesel) | |
| 28 | T2 | $460,000 | 280L (Diesel) | |
| 35 | T3 | $950,000 | 280L (Diesel) | |
| 84 | T6 | $38,000,000 | 280L (Diesel) |
- Level Requirement = Bus Skill
Routes
| Route | Start | Tier | Level Requirement | Stops |
|---|---|---|---|---|
| Los Santos | 1 | 1 | 9 | |
| Los Santos | 1 | 1 | 7 | |
| R3: Los Santos Shuttle | Los Santos | 1 | 1 | 13 |
| Los Santos | 2 | 14 | 10 | |
| Los Santos | 2 | 14 | 10 | |
| Los Santos | 2 | 14 | 14 | |
| M4: LSIA - Galileo Observatory | Los Santos | 2 | 14 | 15 |
| M5: Vinewood Hills - Vespucci Beach | Los Santos | 2 | 14 | 14 |
| M6: Strawberry - Pacific Bluffs | Los Santos | 2 | 14 | 16 |
| Los Santos | 3 | 35 | 20 | |
| Los Santos | 3 | 35 | 16 | |
| Los Santos | 3 | 35 | 14 | |
| Los Santos | 3 | 35 | 16 | |
| F2: Vespucci Beach - Downtown LS | Los Santos | 3 | 35 | 11 |
| C5: Center - LSIA | Los Santos | 4 | 56 | 16 |
| C6: Textile City - El Burro Heights | Los Santos | 4 | 56 | 17 |
| C7: Textile City - Mirror Park | Los Santos | 4 | 56 | 16 |
| C8: East Vinewood - Del Perro - Textile City | Los Santos | 4 | 56 | 13 |
| C9: Rockford Hills - East Los Santos | Los Santos | 4 | 56 | 15 |
| S1: East San Andreas | Los Santos | 6 | 84 | 11 |
| S2: West San Andreas | Los Santos | 6 | 84 | 15 |
| S3: Around San Andreas | Los Santos | 6 | 84 | 22 |
| X1: San Andreas CCW | Los Santos | 6 | 84 | 11 |
| X2: San Andreas CW | Los Santos | 6 | 84 | 13 |
| X3: San Andreas - Sandy Shores | Los Santos | 6 | 84 | 15 |
| Sandy Shores | 2 | 14 | 13 | |
| Sandy Shores | 2 | 14 | 16 | |
| Sandy Shores | 2 | 14 | 18 | |
| Sandy Shores | 2 | 14 | 19 | |
| Sandy Shores | 2 | 14 | 11 | |
| Paleto Bay | 2 | 14 | 13 | |
| Zancudo | 2 | 14 | 15 | |
| LC1: Portland | Liberty City | 3 | 35 | 14 |
| LC2: Portland | Liberty City | 3 | 35 | 20 |
| LC3: Portland | Liberty City | 3 | 35 | 17 |
| LC4: Francis Intl. Airport | Liberty City | 3 | 35 | 17 |
| LC5: Staunton Island | Liberty City | 3 | 35 | 18 |
| LC6: Shoreside Vale | Liberty City | 3 | 35 | 20 |


